The majority of homes have one or more hammers. Hammering nails is a skill that everyone believes they are capable of, much like painting walls. What possible technique might there be to use a hammer, which is only a basic hand instrument and not a power tool like a circular saw or power drill? You would be shocked.
Here are eight vital pointers on how to properly use a hammer and how to penetrate various materials.
Choose the Right Hammer
Every hammer is just another hammer.
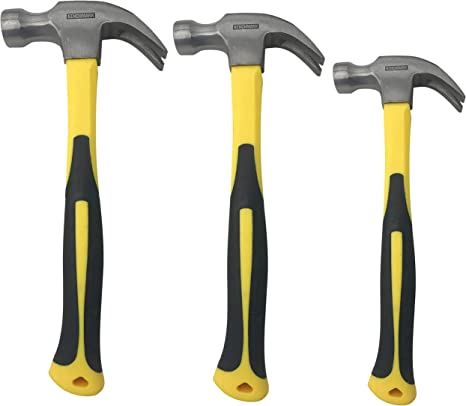
Actually, no. Hammers come in a variety of varieties. The 16-ounce curved-claw hammer on the far left is the type of hammer that can be found in the majority of houses and is a respectable option for versatility in general. This is a good option if you’re just going to have one hammer. But you might want to think about this hammer’s `little sibling, the 13-ounce curved claw hammer, if you want something a little lighter. For many people, a smaller hammer will be simpler to handle.
Even though this hammer is frequently used to drive concrete nails, speciality hammers like the 20 to 30-ounce ripping-claw framing hammer are best avoided by the majority of homeowners. These are for professional carpenters or really skilled do-it-yourselfers who perform a lot of rough carpentry or demolition work. The claws on framing hammers are straighter, the handle is longer, and the head is significantly heavier than on regular claw hammers.
Keep in mind that the purpose of both of these kinds of claw hammers is to drive hardened nails and wood. They shouldn’t be used to drive steel masonry chisels or other metal objects because they are not intended to pound on stone or concrete.
Other specialty hammers to take into account include:
Tack hammer: For driving small brads and tacks, such as carpet tacks, this tool typically has two hitting surfaces at either end of the head. To make driving tiny tacks easier, certain tack hammers contain a magnetic head that can hold the tacks by the head.
Ball peen hammer: This hammer has a rounded and a flat-faced head, and it is made of metalworking-specifically hardened steel.
Mason hammer: This hammer features a striking face on one side and a cutting pick in the shape of a chisel on the other. It comes in a variety of sizes. Its intended use is to split and score bricks and break small pieces of rock.
A mallet is a tool that can be made of wood or rubber and is used to hit wood without destroying it.
Drywall hammer: This instrument can be used to make holes in drywall since it features a tiny ax face on one side of the head. To drive drywall nails, use the flat face on the hammer’s opposite side.
Sledgehammer or cub hammer: These heavy-headed tools are varying sizes of the same basic hammer type and are used for masonry or demolition operations.
Now that we’ve discussed some advice for utilizing the curved-claw hammer efficiently, let’s move on to how to properly hammer a nail.
Know More About Demolition Hammer
Wear Eye Protection
Most people are unaware of how crucial it is to use eye protection while pounding nails because it is not a power tool. However, anything such as nails, splinters of wood or concrete, or even the hammer’s face itself, can be deflected and sent flying in your direction.
Wearing a pair of lightweight, affordable eye protection whenever you are hammering is a fairly simple preventative strategy. Never leave your eyes unprotected.
Hold the Hammer Correctly
Learn how to hold the hammer properly. When starting a nail by tapping on the hammer, avoid “choking up” on it and grabbing it by the neck. Nothing like wielding a hammer in this manner to convey the message “I have no idea what I am doing.”
Grab the hammer at the end of the handle to grasp it securely. Learn to feel it. Swing it around in your hand loosely. A well-made hammer will be nicely balanced and have a small sweep or expanded part at the handle’s end to make it easier for you to grasp on.
Once the hammer is securely grasped, you are prepared to swing.
Maintain Good Nail Holding
Holding a nail down close to the bottom, up against the wood, is a very typical error made while starting a nail. This is completely incorrect because the hammerhead will almost certainly crush your fingers against the wood if you miss the nail’s head, which is sure to happen, especially if you are a beginner. You have some flexibility and are less likely to severely bruise or shatter fingers when accidents happen if you hold the nail close to the top.
Swing properly to strike the nail
Although it may seem obvious, the purpose of using a hammer is to hit the nail square on the head. But you’ll see that this isn’t as simple as it sounds if you’ve ever watched a novice.
The right way to hammer a nail without bending it is as follows:
Hold the nail close to the head, at the top, and place the sharp point where you want to drive it. Hold the nail precisely parallel to the surface you are going to be nailing.
The nail’s head should be at the middle of the hammerhead.
Using mainly elbow motion and a tiny wrist backward bend, pull the hammer back.
Watch the nail’s head, not the hammer, as you swing forward more and more quickly. There should be a small wrist snap to the front just before you make contact with the nail head. The blow shouldn’t be strong; rather, it should just swing faster and faster.
Once you get the knack of nailing, you’ll discover that a few precise, well-placed strikes work much better than pounding a nail viciously and hard.
The majority of the force used when wielding a hammer comes from elbow and shoulder action, with the energy coming from the momentum of the hammer’s head, as you will see if you see a skilled professional carpenter at work. On the other hand, beginners frequently employ excessive wrist bending while hammering, which over time causes accuracy issues and a great deal of wrist tension.
Blunt Your Nail’s Point
Try blunting the nail’s tip before driving it if you discover that your nails are splitting the wood, which is particularly prevalent with narrow pieces of hardwood lumber. The reason why wood splits is because the nail causes the fibers to bend and distort as it pushes through. The likelihood of the nail splitting the wood is decreased by its blunt head, which tends to sever rather than bend the wood fibers. Be warned that this technique slightly reduces the holding ability of the nail because it can’t be grasped as tightly if the wood fibers are severed.
How do you round the nail’s point? Turning the nail upside down and placing the tip up with the head resting on a solid surface is a tried-and-true method. Then, use your hammer to lightly hit the nail tip to slightly dull it.
It is really not any more difficult to drive a nail that has been slightly blunted, and it hardly ever splits wood.
Demolition Hammer Guaranteed Best Construction Material Philippines’ Prices
Drill Pilot Holes
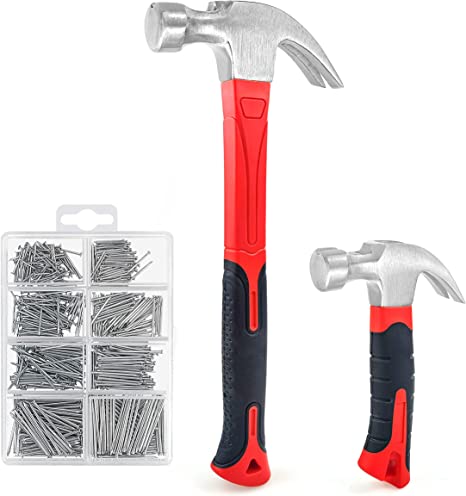
Drilling a pilot hole in the wood with a bit that has a slightly smaller diameter than the shank of the nails you plan to use is another way to prevent splitting and makes driving nails simpler in dense hardwoods.
Drilling pilot holes can slightly lessen the holding power of the nails, similar to blunting the nail tip, but it is a good approach when installing trim moldings or performing other tasks that don’t require maximum holding power.
You must additionally drill pilot holes for the nails using a hammer drill and masonry bit if you are pounding into concrete or cement.
Make the Last Blow Count
The striking head of a hammer has a slightly rounded, convex shape, as may be seen by looking at the tool’s face. With the final blow of the hammer, you can use this profile to drive the nail head flush or just slightly below the surface of the board.
The final blow should drive the nail head just below the surface of the substance you are nailing into, if you time your hammer strokes properly. When done correctly, the hammer’s head will slightly countersink the nail without damaging the wood’s surface. A professional finish carpenter will use a forceful final blow of the hammer to slightly countersink the head of a finish nail, as can be seen if you observe them in action. When done correctly, there is no need to use a nail set tool to countersink the nail heads afterward.
To see other material construction prices, please see here.
To know other construction guides, tips, and methodology for beginners, veterans, and contractors, please see here.
To know the flood prone areas in the Philippines, Top 10 Flood-Prone Areas to Live in the Philippines.
To know more about Concrete Hollow Blocks, Simple Reasons Why Hollow Blocks are Highly Used in the Philippines